
Guest Post: Tennessee Apple Cake
In: Kimz Kitchen, Recipes

(And this one’s good!)
I’m so thankful for guest posters! Especially right now – it’s hard enough keeping up with our 3-4 appointments weekly (and being a one-car family, this has been rather challenging!), much less cooking and posting new recipes. These guest posters are really helping me keep things going here so I can focus on my family. I’m so very thankful!
If any of you have a great recipe on your blog – or just in your mind that you’d like to submit for posting over the next several weeks, send it right on to me at kimzkitchen at gmail dot com. (obviously – you’ll use the @ sign and the . – I’m just discouraging those silly spammers!) I’d be happy to consider any and all posts!
Meanwhile – back to the apples at hand here….
My friend, a chef at one of the best restaurants in town, and a head culinary instructor at a local university offered to give me a little slice of this amazing little apple cake he made. (Which, considering he does all that and has a wife and three kids…I’m not sure how he had time to give me this recipe, let alone bake it. But, nonetheless, we are definitely benefitting here!)
He gave it to me during the Sunday School hour at my church – my husband was the teacher. This cake was gone before I could leave the church building that morning. (Although, I won’t say here if I ate it during my husband’s teaching or during the pastor’s main sermon. Or in the darkest, most hidden away corner I could find by the back bathroom so no one would try to steal a bite. I just won’t say. I’m honest. But not that honest.) 🙂
Whether you have a local apple orchard around – or you have to buy a few pounds at your local grocery store – you should do it. And make this. Fast. It’s really good. Then send me some. Because the one I’m making this week will be gone before yours gets to me. ‘Twould be a shame to run out.
So, thanks, Rob Hansen, for the awesome recipe. And the lovely fall inspiration.

Tennessee Apple Cake
This recipe has been a favorite of my wife for many years. Each year after we go to a nearby apple orchard and pick our apples, it is not long before we have an apple cake baking in the oven. Normally we end up making 2 since the first one seems to disappear much too quickly.
This apple cake is perfect for breakfast, an afternoon snack, or to be served with your favorite ice cream as a dessert. I have used several varieties of apples and all work well, but I love the flavor that the Honey Crisp apple brings to the cake. It has great flavor and sweetness that blends very well with the moistness of the cake. The texture is more like a coffee cake than a traditional high-ratio cake.

Ingredients:
Cake-
2 cups Sugar, granulated
¾ cup Butter, Unsalted, softened
2 Eggs
2 cups All Purpose Flour
1 tsp. Baking Powder
1 tsp. Salt
2 tsp. Cinnamon, ground
1 tsp. Nutmeg, ground
1 ½ tsp. Vanilla
3 ½ cup Apples, diced small
Topping-
1/3 cup Sugar, granulated
¼ tsp. Cinnamon, ground
Utensils–
Stand Mixer – (Kim’s Kitchen note) obviously, there’s no other choice here besides this one.
Spatula
Measuring Spoons
Measuring Cups
Bowls
Paring Knife or Peeler/Corer/Slicer
Instructions:
 1. Cream the sugar and butter until well blended
For those that are not familiar with creaming, it is the process of combining the sugar and the fat in a mixer so that you can incorporate air into the mixture. Margarine can be substituted, but it will slightly change the flavor and texture of the cake.
For this recipe I use unsalted butter that has been softened for several hours. The time of year will affect how long it takes to soften your butter, but it should take a couple of hours at room temperature to get it soft enough to cream easily. If you happen to forget to soften the butter, don’t worry, it is possible to soften in the microwave using the low power setting, but be very careful not to melt the butter.

2. Stir in eggs and dry ingredients, mix thoroughly. (Mixture will be very thick.)
It is best to add the eggs and a little of the dry ingredients first and then scrape down the sides and bottom of the bowl with a rubber spatula. (Make sure you turn off the mixer so you don’t break the spatula or your fingers.) Once you have scraped down the sides, slowly add the remaining dry ingredients.

3. Add vanilla and apples, stir well.I personally like the texture of the cake with little bits of apples throughout the cake, but if you happen to have a peeler/ corer/ slicer, feel free to leave the apples in slices. The process of incorporating the apples into the batter will break the apples into smaller pieces. This is an occasion where using real vanilla is a good idea. If you have a high quality vanilla, you may want to lower the quantity slightly.

4. Spread into a greased and floured 9” x 13” pan.
This is the part that keeps the cake from sticking to the pan when it is rising in the oven. The batter will approximately double in size while baking so it is not completely necessary to grease and flour all the way up the sides of the pan, but you do need to make sure it is at least half way up. For a little textural variation, after coating the pan with butter, you can “dust” with sugar instead of flour. This will add a little sweetness a little more texture to your crust.

5. Sprinkle with topping mixture
The topping does not have to completely cover the cake. It is ok to have ridges in the cake that are not covered. While the amount of topping can be left up to personal preference, avoid adding too much cinnamon sugar. (Kim’s Kitchen note: OK, I know this guy is good and all, and has been doing this for 20 years. But can you really add too much cinnamon sugar?)

6. Bake at 350°F for 50 minutes.
The hardest part now is the waiting. Resist the urge to open the door to check on the cake; this will actually slow down the cooking process and it can lower the quality of your finished product. If you know that your oven heats unevenly, you can turn the cake after 30 minutes.
The finished cake needs to rest before you dig in. Giving it about 20-30 minutes will get it to a temperature that does not scorch your taste buds and will allow you to enjoy the fresh out of the oven goodness that you have worked for.
If by chance there are leftovers, they should be covered, but not until the cake has cooled completely.
Thanks, Rob – and everyone out there – have fun with this one! 🙂
you might also like
-

Roasted Sweet Potato and Sweet Corn Hash
February 25, 2015
-
A Simple Cornbread Stuffing — with Cranberries, Apples, and Sausage
November 26, 2014
-
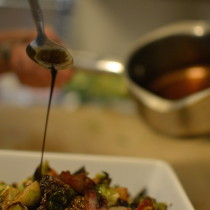
{easy!} Bacon Honey Roasted Brussels Sprouts
November 18, 2014
4 comments
-
julienne vegetable Peeler
September 6, 2014 at 2:51 pm
It’s actually a nice and helpful piece of information. I’m satisfied that
Reply
you shared this helpful information with us. Please keep us up to date like this.
Thanks for sharing.
-
Metal Slug gratis
October 13, 2014 at 9:16 am
After I originally commented I seem to have clicked onn
Reply
the -Notify me when new comments are added- ccheckbox and noow each time a comment is added I get 4
emails with the exact same comment. Is there an easy method you can remove me from that service?
Thanks a lot!


Fudging Ahead
September 26, 2012 at 2:55 am
A perfect fall recipe!
Reply